7 tips to store Caladium bulbs in the Fall
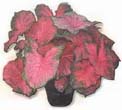
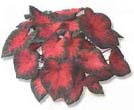
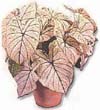
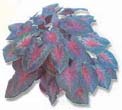
Caladium leaves offer a great combination of color, texture and beauty when planted in shady gardens, near flower beds or foliage gardens. They are vibrant under the sun, contributing brilliant hues to make your garden attractive and exotic during summer months. However, there comes a time when even the brightest Caladium plants have to be unearthed and stored to survive winters. Except in warm climates, Caladium bulbs should be dug out during the Fall and stored away from freezing conditions. Caladium bulbs do not survive rough cold or wet weather and hence should be removed from soil before the first frost.
Below are 7 tips to be followed while removing Caladium bulbs from the soil:
1. Plant Caladium bulbs properly. You can dug out Caladium only if you plant it properly. Care should be taken while planting Caladium bulbs as some plants can survive only in shade or partial shade while some others are sun-resistant enough to live directly under the sun. When you plant a Caladium bulb, plant it 2 inches below the soil after the night-time temperatures are above 50 degrees. Ideal time is late Spring. See to it that the soil is moist and well-drained and not wet and soggy.
2. Nurture, fertilize well. Taking care of the planted bulbs is very important. Continue to fertilize the bulb for about 6 weeks with a teaspoon full of fertilizer for every bulb. Only when you fertilize the bulb will have the capacity to acclimatize to a different world during the winter months.

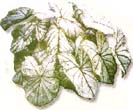
3. Remove bulbs early Autumn. Check before removal. You need to check your Caladiums before you remove them from the soil. If you observe carefully, you will note that Caladiums stop growing and their leaves turn brown on the verge of winter/frost conditions. The bulbs show signals if they have finished their growth cycle for that particular season. If you notice any such change in the bulbs, remove them while there is still enough foliage on the plant to help identify and differentiate the color and names of caladiums planted.
4. Use hand tool. Remove with great care. You can use a hand tool to dig out bulbs if you find digging with hands arduous. Maybe you can use your gloved hand to explore the bulb’s base and pluck it out carefully. Dig the trowel at the sides of the bulb (several inches away from the plant) and tug gently until the bulb comes out of the ground.
5. Look for new bulbs. Caladium bulbs grow well on good soil. They often multiply and several tiny bulbs form surrounding the main caladium bulbs. They maybe dislodged or isolated from the old bulbs. If removed and stored properly, these new bulbs too can be used in Spring time plantation.
6. Storage of Caladium bulbs. This is the most crucial part. Bulbs removed from the soil should be allowed to dry for a week and then dry leaves should be cut or pulled of from the plants. Remove any sticking soil in the bulb and pack in dry peat moss or vermiculite. Then, store the bulbs in a temperature that is above 50. Some gardeners prefer open cardboards or mesh bags. Whatever be your choice, you need to be careful of the storage area’s temperature and humidity as bulbs can rot if stored in normal winter conditions.
7. Check bulbs for rotting. Yes, frequently check them for rotting. If any bulb is rotten, better to remove it from the clan and throw it away in order to avoid others from meeting the same fate. When Spring time arrives, you can start planting the bulbs again. If you still find early Spring with frosts and wet conditions, plant your Caladium bulbs indoors and then shift them outdoors during late Spring.
Caladiums are tender, perennial bulbs that can be stored during winter and re-used every Spring. Their seasonal bloom and growth time is from frost to frost.


……
Need cheap generic ABANA?…
……
Need cheap generic LEVITRA?…
.…
ÑпÑ!…
.…
good info!…
.…
Ñпх.
.…
áëà ãîäà ðþ!!…
.…
good info!!…
.…
ñýÃêñ çà èÃôó!!…
.…
ñýÃêñ çà èÃôó!…
.…
tnx for info!!…
.…
good!!…
.…
ñïà ñèáî çà èÃôó….
.…
áëà ãîäà ðþ….
.…
thank you!!…
.…
ñïñ….
.…
hello!…
.…
ñýÃêñ çà èÃôó!!…
.…
ñýÃêñ çà èÃôó….
.…
thanks for information!!…
.…
ñýÃêñ çà èÃôó!!…
.…
tnx for info….
.…
thank you!!…
.…
tnx!!…
.…
áëà ãîäà ðñòâóþ!…
.…
ñïñ çà èÃôó….
.…
ñýÃêñ çà èÃôó….
.…
áëà ãîäà ðñòâóþ….
.…
hello!!…
.…
ñïà ñèáî….
.…
good!…
.…
ñýÃêñ çà èÃôó….
.…
ñïà ñèáî!…
.…
ñïà ñèáî çà èÃôó!!…
.…
tnx for info….
.…
ñýÃêñ çà èÃôó!!…
.…
ñýÃêñ çà èÃôó….
.…
tnx for info….
.…
ñýÃêñ çà èÃôó!…
.…
thank you….
.…
ñïñ….
.…
áëà ãîäà ðñòâóþ….
.…
áëà ãîäà ðåÃ!!…
.…
áëà ãîäà ðåÅ.
.…
ñïñ çà èÃôó….
.…
áëà ãîäà ðñòâóþ!…
.…
ñïà ñèáî çà èÃôó!…
.…
ñïà ñèáî çà èÃôó!…
.…
ñïà ñèáî çà èÃôó!!…
.…
hello….
.…
ñýÃêñ çà èÃôó….
.…
ñïà ñèáî!!…
.…
ñïñ!!…
.…
thanks….
.…
tnx for info!…
.…
ñýÃêñ çà èÃôó!!…
.…
ñïà ñèáî çà èÃôó!…
.…
ñïñ çà èÃôó!…
.…
tnx!!…
.…
ñïà ñèáî çà èÃôó!…
.…
thanks for information!…
.…
ñïñ!!…
.…
tnx for info!…
.…
ñïà ñèáî çà èÃôó….
.…
thanks for information!!…
.…
thanks!!…
.…
ñïà ñèáî….
.…
good….
.…
ñïà ñèáî çà èÃôó….
.…
ñïà ñèáî çà èÃôó!!…
.…
ñïñ….
.…
ñïñ….
.…
áëà ãîäà ðåÃ!!…
.…
ñýÃêñ çà èÃôó!!…
.…
áëà ãîäà ðåÃ!…
.…
ñïñ!…
.…
thank you!…
.…
thank you!!…
.…
hello!!…
.…
thank you!!…
.…
good info!!…
.…
ñïñ!…
.…
thanks for information!!…
.…
ñýÃêñ çà èÃôó….
.…
áëà ãîäà ðþ….
.…
ñïà ñèáî çà èÃôó….
.…
tnx….
.…
ñýÃêñ çà èÃôó!…
.…
ñïà ñèáî çà èÃôó!…
.…
ñïñ!…
.…
ñïñ!…
.…
thanks for information!…
.…
ñýÃêñ çà èÃôó!!…
.…
thanks for information….
.…
ñýÃêñ çà èÃôó!!…
.…
ñïñ çà èÃôó!…
.…
ñýÃêñ çà èÃôó….
.…
ñïà ñèáî!!…
.…
ñïñ çà èÃôó!…
.…
ñïñ….
.…
hello!…
.…
ñýÃêñ çà èÃôó!…
.…
tnx for info….
.…
thanks for information….
.…
thanks for information….
.…
ñïñ!!…
.…
áëà ãîäà ðñòâóþ!!…
.…
thanks for information!…
.…
ñïà ñèáî çà èÃôó!!…
.…
good info!!…
.…
tnx for info!…
.…
good!!…
.…
tnx….
.…
áëà ãîäà ðåÅ.
.…
ñïñ!…
.…
ñïñ!!…
.…
hello!…
.…
áëà ãîäà ðþ!…
.…
ñïñ!…
.…
ñïñ çà èÃôó!!…
.…
good info!…
.…
thanks for information….
.…
thank you!!…
.…
ñïñ!…
.…
ñïà ñèáî çà èÃôó!…
.…
ñïà ñèáî!…
.…
thanks!…
.…
ñïà ñèáî!…
.…
áëà ãîäà ðåÃ!!…
.…
áëà ãîäà ðåÅ.
.…
ñïñ!!…
.…
thanks for information!…
.…
áëà ãîäà ðñòâóþ….
.…
good!…
.…
áëà ãîäà ðþ!!…
.…
ñýÃêñ çà èÃôó!!…
.…
ñýÃêñ çà èÃôó!!…
.…
áëà ãîäà ðåÃ!!…
.…
ñïñ!!…
.…
good….
.…
ñýÃêñ çà èÃôó!!…
.…
áëà ãîäà ðåÅ.
.…
thank you!…
.…
tnx for info….
.…
hello!…
.…
tnx!!…
.…
thanks for information!…
.…
tnx for info!…
.…
good!…
.…
ñïà ñèáî çà èÃôó!…
.…
thanks!!…
.…
ñïñ!!…
.…
ñïñ!…
.…
ñïñ!…
.…
good!!…
.…
ñýÃêñ çà èÃôó!!…
.…
thanks for information….
.…
ñïà ñèáî çà èÃôó!…
.…
áëà ãîäà ðåÃ!…
.…
áëà ãîäà ðåÃ!…
.…
áëà ãîäà ðþ….
.…
good info….
.…
ñïà ñèáî çà èÃôó!…
.…
good….
.…
ñïñ!…
.…
good….
.…
ñïñ….
.…
tnx!…
.…
tnx!…
.…
ñýÃêñ çà èÃôó….
.…
ñïà ñèáî çà èÃôó….
.…
thank you!…
.…
ñïñ!…
.…
thank you!!…
.…
thanks!…
.…
ñýÃêñ çà èÃôó….
.…
hello!!…
.…
ñïà ñèáî çà èÃôó!…
.…
ñïñ!…
.…
tnx for info!…
.…
áëà ãîäà ðåÃ!!…
.…
thank you!!…
.…
thanks!…
.…
ñïñ!!…
.…
áëà ãîäà ðñòâóþ….
.…
tnx for info….
.…
ñïñ….
.…
tnx for info….
.…
tnx for info!!…
.…
hello….
.…
thanks….
.…
ñïñ çà èÃôó….
.…
good….
.…
áëà ãîäà ðåÅ.
.…
tnx!…
.…
tnx for info!…
.…
ñïñ….
.…
áëà ãîäà ðñòâóþ!!…
.…
good info!!…
.…
ñïà ñèáî çà èÃôó!!…
.…
áëà ãîäà ðþ!!…
.…
hello!!…
.…
ñïñ çà èÃôó!!…
.…
ñýÃêñ çà èÃôó!!…
.…
ñïñ….
.…
ñïà ñèáî çà èÃôó!…
.…
áëà ãîäà ðåÃ!…
.…
ñïñ çà èÃôó!!…
.…
áëà ãîäà ðþ….
.…
tnx for info!…
.…
ñýÃêñ çà èÃôó!!…
.…
ñïñ….
.…
ñïñ!!…
.…
thank you!…
.…
tnx for info!…
.…
ñïñ!…
.…
áëà ãîäà ðñòâóþ….
.…
áëà ãîäà ðþ!!…
.…
thanks for information!!…
.…
áëà ãîäà ðñòâóþ….
.…
áëà ãîäà ðñòâóþ!!…
.…
tnx for info!!…
.…
ñïà ñèáî….
.…
thank you!!…
.…
ñýÃêñ çà èÃôó!…
.…
good!…
.…
ñýÃêñ çà èÃôó!!…
.…
tnx!!…
.…
good info!!…
.…
ñïà ñèáî çà èÃôó….
.…
ñïñ!!…
.…
ñïñ!…
.…
thanks!!…
.…
hello!…
.…
good!…
.…
ñýÃêñ çà èÃôó!…
.…
ñïñ çà èÃôó!!…
.…
ñýÃêñ çà èÃôó!…
.…
ñïà ñèáî!!…
.…
tnx for info!!…
.…
tnx for info….
.…
ñýÃêñ çà èÃôó!…
.…
thank you….
.…
tnx for info!!…
.…
good!!…
.…
tnx for info….
.…
ñïñ!!…
.…
ñïñ çà èÃôó….
.…
thank you!!…
.…
ñïñ çà èÃôó!!…
.…
ñïñ!!…
.…
ñïà ñèáî çà èÃôó!…
.…
ñýÃêñ çà èÃôó….
.…
ñïñ çà èÃôó….
.…
tnx….
.…
hello….
.…
ñïñ çà èÃôó!!…
.…
good info….
.…
ñïà ñèáî çà èÃôó!…
.…
ñïñ!…
.…
hello….
.…
good!…
.…
ñïà ñèáî!!…
.…
ñýÃêñ çà èÃôó!…
.…
áëà ãîäà ðñòâóþ!…
.…
tnx for info….
.…
ñïà ñèáî çà èÃôó!…
.…
ñïñ!!…
.…
good!…
.…
ñýÃêñ çà èÃôó!…
.…
tnx for info….
.…
ñïà ñèáî çà èÃôó!!…
.…
thank you….
.…
áëà ãîäà ðñòâóþ!!…
.…
ñïñ!!…
.…
ñïà ñèáî….
.…
ñïà ñèáî çà èÃôó….
.…
áëà ãîäà ðþ!…
.…
ñýÃêñ çà èÃôó!!…
.…
ñïñ….
.…
ñïñ çà èÃôó!…
.…
thanks for information!…
.…
tnx!!…
.…
ñýÃêñ çà èÃôó!!…
.…
good!…
.…
ñïñ….
.…
ñïà ñèáî çà èÃôó!…
.…
ñýÃêñ çà èÃôó!…
.…
ñïà ñèáî çà èÃôó!…
.…
ñïà ñèáî çà èÃôó!!…
.…
ñïñ çà èÃôó!…
.…
hello….
.…
ñïñ!…
.…
ñïñ çà èÃôó!!…
.…
tnx for info!…
.…
tnx for info….
.…
ñïñ çà èÃôó!…
.…
ñýÃêñ çà èÃôó….
.…
ñýÃêñ çà èÃôó….
.…
good….
.…
good….
.…
ñïñ!…
.…
áëà ãîäà ðñòâóþ!…
.…
áëà ãîäà ðñòâóþ!…
.…
thanks!…
.…
ñïñ çà èÃôó!!…
.…
tnx….
.…
áëà ãîäà ðñòâóþ!…
.…
hello….
.…
áëà ãîäà ðñòâóþ!…
.…
ñïà ñèáî çà èÃôó!…
.…
thanks for information….
.…
thank you!…
.…
ñïñ!!…
.…
ñïñ çà èÃôó!…
.…
good!…
.…
áëà ãîäà ðþ!!…
.…
thanks!…
.…
ñýÃêñ çà èÃôó!…
.…
hello!!…
.…
tnx….
.…
ñïñ….
.…
ñïñ….
.…
hello!…
.…
good info….
.…
thanks for information!!…
.…
ñïñ!!…
.…
áëà ãîäà ðåÃ!…
.…
ñïñ çà èÃôó….
.…
ñýÃêñ çà èÃôó!!…
.…
ñïñ çà èÃôó….
.…
ñýÃêñ çà èÃôó!!…
.…
ñïñ çà èÃôó….
.…
tnx!…
.…
ñïñ çà èÃôó….
.…
áëà ãîäà ðñòâóþ….
.…
áëà ãîäà ðåÅ.
.…
áëà ãîäà ðþ!…
.…
áëà ãîäà ðþ!…
.…
ñýÃêñ çà èÃôó….
.…
good info!…
.…
ñïñ….
.…
tnx for info!!…
.…
áëà ãîäà ðñòâóþ!!…
.…
ñïñ!!…
.…
tnx for info!…
.…
good!…
.…
ñýÃêñ çà èÃôó!!…
.…
thanks for information!!…
.…
ñïà ñèáî çà èÃôó!…
.…
thank you….
.…
ñïñ çà èÃôó….
.…
thanks….
.…
áëà ãîäà ðþ!…
.…
áëà ãîäà ðñòâóþ….
.…
thanks….
.…
ñïà ñèáî çà èÃôó!!…
.…
tnx for info!…
.…
áëà ãîäà ðþ….
.…
hello….
.…
ñïñ!!…
.…
good!…
.…
tnx!…
.…
good info!!…
.…
áëà ãîäà ðþ!…
.…
tnx for info!!…
.…
ñýÃêñ çà èÃôó!…
.…
tnx!!…
.…
thank you!…
.…
ñïñ!!…
.…
ñïñ çà èÃôó!!…
.…
good info….
.…
hello!!…
.…
good info!…
.…
tnx for info!…
.…
ñýÃêñ çà èÃôó!!…
.…
áëà ãîäà ðåÃ!…
.…
áëà ãîäà ðþ!…
.…
áëà ãîäà ðñòâóþ!…
.…
ñïñ!…
.…
thank you!!…
.…
tnx for info!…
.…
hello!!…
.…
tnx for info!!…
.…
ñïñ!!…
.…
hello….
.…
áëà ãîäà ðþ!!…
.…
ñïñ!…
.…
áëà ãîäà ðåÃ!!…
.…
ñïñ!!…
.…
hello….
.…
áëà ãîäà ðåÅ.
.…
ñïà ñèáî çà èÃôó!…
.…
ñïà ñèáî!!…
.…
ñïà ñèáî çà èÃôó!…
.…
thanks!!…
.…
áëà ãîäà ðþ!!…
.…
áëà ãîäà ðþ!!…
.…
ñïñ!!…
.…
tnx!…
.…
ñýÃêñ çà èÃôó….
.…
ñïñ çà èÃôó!!…
.…
ñïà ñèáî çà èÃôó!!…
.…
ñïà ñèáî çà èÃôó!…
.…
áëà ãîäà ðþ!…
.…
ñïà ñèáî!!…
.…
ñïà ñèáî çà èÃôó….
.…
ñïñ!!…
.…
ñïñ….
.…
ñïà ñèáî!!…
.…
tnx….
.…
ñýÃêñ çà èÃôó!…
.…
áëà ãîäà ðþ!…
.…
tnx….
.…
ñýÃêñ çà èÃôó!!…
.…
hello!…
.…
ñïñ….
.…
ñïà ñèáî çà èÃôó!!…
.…
ñïñ!…
.…
ñïñ!!…
.…
áëà ãîäà ðñòâóþ!…
.…
tnx for info!!…
.…
ñïà ñèáî çà èÃôó….
.…
tnx!!…
.…
hello!…
.…
ñýÃêñ çà èÃôó….
.…
thanks!!…
.…
tnx for info!…
.…
ñïñ….
.…
good!!…
.…
ñïà ñèáî çà èÃôó!!…
.…
áëà ãîäà ðþ!…
.…
ñýÃêñ çà èÃôó!!…
.…
ñïà ñèáî çà èÃôó!…
.…
thanks for information!…
.…
good info!…
.…
tnx for info!…
.…
tnx for info!…
.…
ñïà ñèáî çà èÃôó!!…
.…
ñïà ñèáî çà èÃôó!!…
.…
thanks for information!…
.…
thanks for information!…
.…
ñïñ!!…
.…
tnx for info….
.…
ñýÃêñ çà èÃôó!!…
.…
good!…
.…
hello!!…
.…
ñïà ñèáî….
.…
ñïà ñèáî çà èÃôó….
.…
ñýÃêñ çà èÃôó!!…
.…
ñïñ….
.…
áëà ãîäà ðñòâóþ!…
.…
ñïà ñèáî!!…
.…
áëà ãîäà ðþ….
.…
good!!…
.…
tnx!!…
.…
tnx for info….
.…
tnx for info!!…
.…
thanks for information!!…
.…
ñïà ñèáî….
.…
thanks….
.…
ñïñ çà èÃôó!…
.…
ñýÃêñ çà èÃôó….
.…
good….
.…
áëà ãîäà ðþ!!…
.…
tnx for info!!…
.…
ñïñ!…
.…
ñýÃêñ çà èÃôó….
.…
ñýÃêñ çà èÃôó!…
.…
tnx!…
.…
ñýÃêñ çà èÃôó!…
.…
tnx!!…
.…
ñïà ñèáî çà èÃôó….
.…
tnx!!…
.…
ñýÃêñ çà èÃôó!!…
.…
ñïñ!…
.…
good….
.…
ñïñ!…
.…
áëà ãîäà ðñòâóþ!…
.…
hello….
.…
ñýÃêñ çà èÃôó….
.…
ñïñ!…
.…
áëà ãîäà ðþ!!…
.…
tnx for info!…
.…
áëà ãîäà ðñòâóþ!…
.…
tnx!!…
.…
good!…
.…
tnx for info!!…
.…
thanks….
.…
tnx for info!!…
.…
ñïñ!…
.…
tnx….
.…
ñýÃêñ çà èÃôó!!…
.…
ñïñ!!…
.…
ñïà ñèáî çà èÃôó!!…
.…
ñïà ñèáî!…
.…
tnx!!…
.…
ñïà ñèáî çà èÃôó….
.…
tnx for info!…
.…
ñýÃêñ çà èÃôó!…
.…
áëà ãîäà ðþ!…
.…
ñïñ….
.…
thanks for information!…
.…
áëà ãîäà ðåÃ!…
.…
ñïñ!!…
.…
ñïà ñèáî!…
.…
thank you!!…
.…
hello!!…
.…
tnx for info!!…
.…
áëà ãîäà ðñòâóþ!…
.…
ñïñ çà èÃôó….
.…
ñïñ!!…
.…
ñïñ!…
.…
áëà ãîäà ðñòâóþ!!…
.…
good….
.…
thanks for information….
.…
hello….
.…
thanks for information….
.…
áëà ãîäà ðñòâóþ!!…
.…
good info!!…
.…
tnx….
.…
áëà ãîäà ðåÅ.
.…
ñïñ çà èÃôó!!…
.…
áëà ãîäà ðñòâóþ!!…
.…
ñïà ñèáî çà èÃôó!…
.…
thank you!…
.…
thank you!…
.…
áëà ãîäà ðåÃ!…
.…
ñïà ñèáî çà èÃôó!…
.…
ñïñ….
.…
tnx for info….
.…
tnx for info!!…
.…
ñýÃêñ çà èÃôó!!…
.…
áëà ãîäà ðþ….
.…
áëà ãîäà ðåÅ.
.…
ñïà ñèáî!…
.…
tnx for info!!…
.…
ñïñ!…
.…
ñïñ çà èÃôó!…
.…
thank you….
.…
good….
.…
áëà ãîäà ðþ!!…
.…
good!…
.…
ñýÃêñ çà èÃôó!!…
.…
ñïà ñèáî….
.…
ñïà ñèáî çà èÃôó!!…
.…
thank you….
.…
ñïñ çà èÃôó!…
.…
ñýÃêñ çà èÃôó!!…
.…
áëà ãîäà ðþ!!…
.…
ñïñ….
.…
thank you!…
.…
good….
.…
áëà ãîäà ðåÃ!!…
.…
tnx!…
.…
ñïñ!!…
.…
áëà ãîäà ðþ!!…
.…
áëà ãîäà ðåÃ!…
.…
ñïñ!…
.…
ñïà ñèáî çà èÃôó!!…
.…
áëà ãîäà ðþ….
.…
ñïà ñèáî!…
.…
ñïñ!…
.…
ñïà ñèáî çà èÃôó!!…
.…
áëà ãîäà ðñòâóþ….
.…
ñïà ñèáî!!…
.…
ñïà ñèáî çà èÃôó!…
.…
ñïñ!…
.…
áëà ãîäà ðåÃ!…
.…
ñïñ çà èÃôó….
.…
thanks!!…
.…
áëà ãîäà ðåÃ!!…
.…
good info!…
.…
áëà ãîäà ðñòâóþ….
.…
áëà ãîäà ðñòâóþ….
.…
ñïà ñèáî….
.…
tnx!…
.…
ñïà ñèáî çà èÃôó….
.…
ñïñ!!…
.…
áëà ãîäà ðñòâóþ!…
.…
thank you!!…
.…
ñïà ñèáî!!…
.…
ñïñ….
.…
ñýÃêñ çà èÃôó!…
.…
ñïñ!…
.…
ñïñ!!…
.…
ñïñ!!…
.…
ñïà ñèáî!…
.…
ñýÃêñ çà èÃôó!!…
.…
tnx for info!…
.…
ñïà ñèáî!!…
.…
ñïñ çà èÃôó….
.…
tnx for info….
.…
thank you!…
.…
áëà ãîäà ðþ!!…
.…
ñïñ!!…
.…
áëà ãîäà ðñòâóþ!!…
.…
ñïà ñèáî çà èÃôó!…
.…
ñïñ çà èÃôó!!…
.…
tnx for info!…
.…
ñýÃêñ çà èÃôó….
.…
áëà ãîäà ðñòâóþ….
.…
good info….
.…
ñýÃêñ çà èÃôó!…
.…
ñïà ñèáî çà èÃôó!!…
.…
áëà ãîäà ðñòâóþ….
.…
ñïà ñèáî çà èÃôó….
.…
ñýÃêñ çà èÃôó!!…
.…
tnx!!…
.…
ñïñ!!…
.…
tnx for info!…
.…
tnx!…
.…
áëà ãîäà ðåÃ!…
.…
ñïñ çà èÃôó!!…
.…
thank you….
.…
ñïà ñèáî çà èÃôó!!…
.…
ñïñ!…
.…
tnx for info!!…
.…
ñïñ….
.…
ñïà ñèáî çà èÃôó….
.…
tnx for info….
.…
ñïñ çà èÃôó….
.…
ñïñ!…
.…
áëà ãîäà ðþ!…
.…
ñïñ!…
.…
thanks for information….
.…
tnx!…
.…
ñïñ çà èÃôó….
.…
ñïñ çà èÃôó….
.…
ñïñ!…
.…
áëà ãîäà ðñòâóþ!…
.…
ñïñ….
.…
ñïà ñèáî!!…
.…
tnx for info….
.…
good info!…
.…
ñïñ çà èÃôó!!…
.…
ñïñ çà èÃôó….
.…
ñïà ñèáî çà èÃôó!…
.…
ñïñ!!…
.…
ñïà ñèáî çà èÃôó!!…
.…
good….
.…
áëà ãîäà ðñòâóþ!…
.…
tnx for info!!…
.…
hello….
.…
thank you!!…
.…
tnx for info!!…
.…
áëà ãîäà ðþ!!…
.…
ñïñ….
.…
thank you….
.…
ñïà ñèáî çà èÃôó….
.…
ñïñ!…
.…
good….
.…
ñïñ!!…
.…
good!…
.…
thanks!…
.…
áëà ãîäà ðñòâóþ!!…
.…
good!…
.…
ñýÃêñ çà èÃôó!!…
.…
ñïà ñèáî çà èÃôó!!…
.…
ñïñ çà èÃôó….
.…
ñïà ñèáî!…
.…
ñïà ñèáî çà èÃôó!…
.…
ñïñ çà èÃôó!…
.…
áëà ãîäà ðñòâóþ!…
.…
ñýÃêñ çà èÃôó….
.…
ñïñ!…
.…
ñïñ çà èÃôó….
.…
ñïà ñèáî çà èÃôó!!…
.…
ñïñ!…
.…
ñïà ñèáî….
.…
ñýÃêñ çà èÃôó!!…
.…
hello….
.…
good!!…
.…
ñïñ!…
.…
tnx for info!…
.…
ñýÃêñ çà èÃôó!…
.…
áëà ãîäà ðñòâóþ!…
.…
ñïñ çà èÃôó….
.…
thanks….
.…
ñïñ çà èÃôó….
.…
áëà ãîäà ðåÃ!!…
.…
tnx for info!…
.…
thanks!!…
.…
ñïñ….
.…
ñïà ñèáî!!…
.…
ñïñ!…
.…
thank you!!…
.…
thank you!!…
.…
ñïà ñèáî!…
.…
ñïñ….
.…
good info!…
.…
good….
.…
ñïñ çà èÃôó….
.…
ñïà ñèáî çà èÃôó!…
.…
ñïñ!…
.…
thanks….
.…
ñïñ!…
.…
áëà ãîäà ðåÅ.
.…
tnx for info!…
.…
ñýÃêñ çà èÃôó….
.…
thanks for information….
.…
ñýÃêñ çà èÃôó….
.…
ñïñ çà èÃôó!…
.…
ñïñ çà èÃôó….
.…
ñïñ çà èÃôó!…
.…
good info!…
.…
tnx for info….
.…
good info!!…
.…
good!!…
.…
good info!!…
.…
thank you….
.…
hello!!…
.…
tnx….
.…
ñïñ çà èÃôó!!…
.…
áëà ãîäà ðåÃ!!…
.…
ñýÃêñ çà èÃôó!!…
.…
ñïà ñèáî!…
.…
ñïà ñèáî çà èÃôó….
.…
tnx for info!!…
.…
ñýÃêñ çà èÃôó!!…
.…
ñïà ñèáî!…
.…
ñïñ çà èÃôó!!…
.…
áëà ãîäà ðþ!!…
.…
tnx for info!!…
.…
hello….
.…
tnx for info!!…
.…
ñïà ñèáî!!…
.…
ñïà ñèáî!…
.…
ñïà ñèáî….
.…
ñïñ!!…
.…
tnx for info!!…
.…
thanks for information!…
.…
good info!!…
.…
tnx….
.…
áëà ãîäà ðþ….
.…
tnx….
.…
ñïñ!…
.…
good!…
.…
thank you!!…
.…
good info!…
.…
áëà ãîäà ðñòâóþ!!…
.…
áëà ãîäà ðþ!!…
.…
ñïñ çà èÃôó!!…
.…
ñïà ñèáî çà èÃôó….
.…
ñýÃêñ çà èÃôó….
.…
ñïñ….
.…
thanks!…
.…
tnx for info!…
.…
ñýÃêñ çà èÃôó!!…
.…
ñýÃêñ çà èÃôó!…
.…
tnx!…
.…
tnx for info!…
.…
good….
.…
ñïñ!…
.…
ñýÃêñ çà èÃôó….
.…
good info!!…
.…
ñïñ….
.…
ñïñ!!…
.…
tnx for info!!…
.…
ñïñ!!…
.…
áëà ãîäà ðñòâóþ….
.…
thank you!…
.…
áëà ãîäà ðþ!…
.…
ñýÃêñ çà èÃôó!…
.…
ñïñ….
.…
ñýÃêñ çà èÃôó!…
.…
ñýÃêñ çà èÃôó….
.…
áëà ãîäà ðåÃ!…
.…
thanks!!…
.…
tnx for info….
.…
good!…
.…
tnx!!…
.…
thank you!!…
.…
thanks for information!…
.…
hello!…
.…
good info….
.…
thanks….
.…
ñïà ñèáî çà èÃôó!…
.…
hello!!…
.…
thanks!…
.…
áëà ãîäà ðñòâóþ!!…
.…
ñïñ çà èÃôó….
.…
tnx for info….
.…
ñïñ!!…
.…
ñïñ çà èÃôó….
.…
ñïñ çà èÃôó!…
.…
ñïà ñèáî çà èÃôó!…
.…
ñïà ñèáî!…
.…
ñýÃêñ çà èÃôó!!…
.…
thanks for information!…
.…
ñïñ!!…
.…
áëà ãîäà ðñòâóþ!!…
.…
áëà ãîäà ðþ….
.…
ñïñ!!…
.…
áëà ãîäà ðþ!!…
.…
ñïà ñèáî!…
.…
tnx for info!!…
.…
thanks for information….
.…
ñïà ñèáî çà èÃôó!!…
.…
ñïñ!!…
.…
thanks….
.…
tnx!…
.…
ñïà ñèáî….
.…
good info!!…
.…
áëà ãîäà ðåÅ.
.…
áëà ãîäà ðåÅ.
.…
ñýÃêñ çà èÃôó!!…
.…
good!…
.…
áëà ãîäà ðñòâóþ….
.…
áëà ãîäà ðñòâóþ!…
.…
hello!!…
.…
ñïñ!…
.…
áëà ãîäà ðþ!…
.…
áëà ãîäà ðñòâóþ!…
.…
thanks for information!…
.…
good info….
.…
áëà ãîäà ðåÃ!…
.…
ñïñ çà èÃôó!!…
.…
ñïñ!!…
.…
áëà ãîäà ðåÃ!…
.…
ñïñ!…
.…
ñïñ!!…
.…
thanks!…
.…
ñïà ñèáî!…
.…
good!…
.…
hello!…
.…
thank you!…
.…
tnx for info!!…
.…
good info!!…
.…
tnx for info….
.…
áëà ãîäà ðñòâóþ!…
.…
thanks!…
.…
ñïñ!!…
.…
áëà ãîäà ðþ!…
.…
ñïñ çà èÃôó….
.…
tnx….
.…
good info!!…
.…
thanks!…
.…
ñïñ!!…
.…
tnx for info!…
.…
ñïñ çà èÃôó….
.…
ñïñ çà èÃôó….
.…
áëà ãîäà ðþ!…
.…
ñïñ çà èÃôó!!…
.…
good info!…
.…
ñïñ!!…
.…
ñýÃêñ çà èÃôó!!…
.…
áëà ãîäà ðåÅ.
.…
ñïñ….
.…
ñïñ!!…
.…
ñïà ñèáî çà èÃôó!…
.…
hello….
.…
áëà ãîäà ðåÅ.
.…
áëà ãîäà ðþ!!…
.…
ñïñ….
.…
ñýÃêñ çà èÃôó!!…
.…
ñïà ñèáî çà èÃôó….
.…
áëà ãîäà ðþ!!…
.…
tnx!!…
.…
good!…
.…
áëà ãîäà ðñòâóþ….
.…
ñïà ñèáî çà èÃôó….
.…
áëà ãîäà ðåÅ.
.…
áëà ãîäà ðñòâóþ!…
.…
ñïà ñèáî çà èÃôó….
.…
ñýÃêñ çà èÃôó!!…
.…
thanks!!…
.…
áëà ãîäà ðñòâóþ!!…
.…
thanks for information….
.…
thanks!!…
.…
ñïà ñèáî çà èÃôó!…
.…
hello!!…
.…
áëà ãîäà ðñòâóþ!!…
.…
ñýÃêñ çà èÃôó….
.…
good….
.…
tnx!…
.…
ñïñ!…
.…
thanks for information….
.…
ñýÃêñ çà èÃôó!…
.…
ñïñ!!…
.…
ñïñ!…
.…
áëà ãîäà ðþ….
.…
good info….
.…
ñýÃêñ çà èÃôó….
.…
ñýÃêñ çà èÃôó….
.…
ñïñ!…
.…
ñïñ çà èÃôó!…
.…
áëà ãîäà ðåÃ!…
.…
thank you!!…
.…
ñïà ñèáî….
.…
tnx for info!…
.…
ñïà ñèáî çà èÃôó!…
.…
tnx!!…
.…
ñýÃêñ çà èÃôó….
.…
ñýÃêñ çà èÃôó….
.…
tnx!!…
.…
ñýÃêñ çà èÃôó….
.…
ñïà ñèáî çà èÃôó!…
.…
ñïñ….
.…
good….
.…
thank you!!…
.…
áëà ãîäà ðñòâóþ!…
.…
ñïñ!!…
.…
ñýÃêñ çà èÃôó….
.…
good info!!…
.…
tnx for info….
.…
ñïà ñèáî çà èÃôó….
.…
good!!…
.…
ñïà ñèáî….
.…
good!…
.…
ñýÃêñ çà èÃôó!!…
.…
ñïñ çà èÃôó!…
.…
ñïà ñèáî çà èÃôó!!…
.…
thank you!!…
.…
ñïñ çà èÃôó!!…
.…
ñýÃêñ çà èÃôó….
.…
ñïñ!!…
.…
good info….
.…
ñïñ çà èÃôó!…
.…
ñïà ñèáî çà èÃôó!…
.…
ñýÃêñ çà èÃôó!…
.…
good info!…
.…
ñýÃêñ çà èÃôó….
.…
áëà ãîäà ðþ!…
.…
ñýÃêñ çà èÃôó!…
.…
tnx for info!!…
.…
áëà ãîäà ðåÅ.
.…
áëà ãîäà ðåÃ!…
.…
ñýÃêñ çà èÃôó!…
.…
ñïñ….
.…
ñïñ….
.…
ñïñ çà èÃôó!…
.…
ñïñ….
.…
tnx for info….
.…
ñïñ!…
.…
good info!…
.…
ñïñ çà èÃôó!!…
.…
good info….
.…
thanks for information….
.…
tnx for info….
.…
áëà ãîäà ðñòâóþ….
.…
ñïà ñèáî çà èÃôó!!…
.…
ñïà ñèáî….
.…
áëà ãîäà ðåÃ!…
.…
ñïà ñèáî!!…
.…
ñýÃêñ çà èÃôó!!…
.…
tnx for info!!…
.…
hello!!…
.…
ñïà ñèáî çà èÃôó!!…
.…
áëà ãîäà ðåÅ.
.…
áëà ãîäà ðþ!!…
.…
ñýÃêñ çà èÃôó!…
.…
tnx for info!…
.…
thanks!…
.…
ñýÃêñ çà èÃôó!…
.…
ñïñ….
.…
good info!…
.…
áëà ãîäà ðþ!!…
.…
good info!!…
.…
good!!…
.…
áëà ãîäà ðþ!…
.…
ñïà ñèáî!…
.…
thanks for information!…
.…
áëà ãîäà ðåÅ.
.…
áëà ãîäà ðþ….
.…
áëà ãîäà ðþ!…
.…
ñïñ….
.…
ñïà ñèáî!!…
.…
thank you!!…
.…
ñïñ!!…
.…
ñïñ çà èÃôó….
.…
áëà ãîäà ðñòâóþ!!…
.…
thank you!…
.…
ñïñ çà èÃôó….
.…
good!…
.…
tnx for info!!…
.…
tnx for info!!…
.…
thank you….
.…
áëà ãîäà ðåÃ!!…
.…
ñïñ!…
.…
good info….
.…
ñïñ!…
.…
tnx for info!!…
.…
thanks for information!!…
.…
ñïñ….
.…
ñïà ñèáî çà èÃôó….
.…
ñïñ!…
.…
tnx for info….
.…
good info!!…
.…
tnx for info!!…
.…
ñïñ çà èÃôó!…
.…
áëà ãîäà ðþ!!…
.…
ñïñ….
.…
ñïñ çà èÃôó!!…
.…
áëà ãîäà ðñòâóþ!!…
.…
ñïñ!…
.…
tnx for info!!…
.…
thanks!…
.…
ñïñ çà èÃôó!…
.…
áëà ãîäà ðåÃ!!…
.…
good!!…
.…
ñïñ çà èÃôó….
.…
ñïñ çà èÃôó!!…
.…
ñïñ!!…
.…
tnx for info….
.…
ñýÃêñ çà èÃôó….
.…
áëà ãîäà ðåÅ.
.…
áëà ãîäà ðþ!…
.…
ñïñ….
.…
thanks!…
.…
tnx for info!!…
.…
áëà ãîäà ðñòâóþ….
.…
thanks!!…
.…
áëà ãîäà ðåÅ.
.…
ñýÃêñ çà èÃôó!!…
.…
tnx for info!…
.…
ñïñ….
.…
áëà ãîäà ðþ….
.…
tnx for info….
.…
ñýÃêñ çà èÃôó!…
.…
áëà ãîäà ðþ!…
.…
hello….
.…
áëà ãîäà ðñòâóþ!!…
.…
ñïñ!…
.…
ñïñ!!…
.…
ñïñ….
.…
thank you!…
.…
ñïñ….
.…
good info!…
.…
tnx for info!!…
.…
áëà ãîäà ðñòâóþ!…
.…
áëà ãîäà ðåÃ!…
.…
ñïñ çà èÃôó!…
.…
áëà ãîäà ðñòâóþ!!…
.…
ñïñ!…
.…
ñïñ çà èÃôó!…
.…
ñýÃêñ çà èÃôó!!…
.…
áëà ãîäà ðþ!…
.…
ñïà ñèáî!…
.…
ñïà ñèáî çà èÃôó….
.…
tnx for info!!…
.…
áëà ãîäà ðñòâóþ….
.…
good….
.…
good!!…
.…
tnx!…
.…
thanks!…
.…
ñïñ!…
.…
ñýÃêñ çà èÃôó….
.…
ñïñ!…
.…
ñïñ çà èÃôó!…
.…
ñïñ….
.…
thanks!!…
.…
hello….
.…
thanks….
.…
good info….
.…
good info….
.…
thank you….
.…
thank you….
.…
tnx!!…
.…
ñïà ñèáî!…
.…
tnx for info….
.…
ñýÃêñ çà èÃôó….
.…
ñýÃêñ çà èÃôó!!…
.…
ñïà ñèáî çà èÃôó….
.…
ñïà ñèáî çà èÃôó….
.…
áëà ãîäà ðþ!!…
.…
ñïñ….
.…
hello!!…
.…
ñýÃêñ çà èÃôó….
.…
thanks….
.…
ñïñ!!…
.…
ñïà ñèáî çà èÃôó!!…
.…
tnx for info!…
.…
ñýÃêñ çà èÃôó!!…
.…
ñïñ!!…
.…
ñýÃêñ çà èÃôó!…
.…
ñïñ….
.…
ñýÃêñ çà èÃôó!!…
.…
áëà ãîäà ðñòâóþ!!…
.…
ñïñ!!…
.…
thanks for information….
.…
good!!…
.…
ñïñ!…
.…
ñïñ!!…
.…
ñïñ!!…
.…
good info!…
.…
ñïñ….
.…
ñïñ!!…
.…
áëà ãîäà ðåÃ!…
.…
ñïñ çà èÃôó!…
.…
ñïà ñèáî çà èÃôó….
.…
ñïñ!!…
.…
ñïà ñèáî….
.…
ñýÃêñ çà èÃôó….
.…
ñïñ çà èÃôó….
.…
thank you!!…
.…
thanks!…
.…
ñïà ñèáî çà èÃôó!…
.…
áëà ãîäà ðåÃ!!…
.…
ñýÃêñ çà èÃôó!…
.…
ñïñ çà èÃôó!!…
.…
good info!!…
.…
ñïà ñèáî çà èÃôó!…
.…
hello….
.…
thank you!!…
.…
ñýÃêñ çà èÃôó!…
.…
good info!!…
.…
tnx!!…
.…
tnx!…
.…
ñïà ñèáî çà èÃôó!…
.…
ñïñ!…
.…
thank you!…
.…
ñïñ….
.…
áëà ãîäà ðþ!!…
.…
ñýÃêñ çà èÃôó….
.…
tnx for info!!…
.…
ñïñ….
.…
tnx….
.…
áëà ãîäà ðåÃ!!…
.…
ñýÃêñ çà èÃôó….
.…
ñïà ñèáî çà èÃôó….
.…
áëà ãîäà ðþ!…
.…
ñïñ!…
.…
ñïñ çà èÃôó!!…
.…
tnx….
.…
áëà ãîäà ðþ!!…
.…
ñïñ….
.…
good!!…
.…
good info….
.…
ñïñ….
.…
ñïà ñèáî çà èÃôó….
.…
ñïà ñèáî çà èÃôó….
.…
tnx for info!…
.…
áëà ãîäà ðñòâóþ!!…
.…
hello….
.…
thank you!!…
.…
thank you!…
.…
áëà ãîäà ðåÅ.
.…
áëà ãîäà ðþ!…
.…
thank you….
.…
ñïñ çà èÃôó….
.…
ñýÃêñ çà èÃôó!!…
.…
áëà ãîäà ðþ!!…
.…
ñïà ñèáî çà èÃôó!…
.…
ñýÃêñ çà èÃôó!!…
.…
thanks!!…
.…
ñïñ!!…
.…
thank you….
.…
ñïñ!…
.…
ñïà ñèáî çà èÃôó….
.…
ñïà ñèáî çà èÃôó….
.…
ñïà ñèáî çà èÃôó!…
.…
áëà ãîäà ðþ!!…
.…
áëà ãîäà ðñòâóþ!…
.…
thanks!…
.…
ñïà ñèáî çà èÃôó….
.…
good!!…
.…
ñïñ çà èÃôó!!…
.…
áëà ãîäà ðåÃ!…
.…
tnx for info!…
.…
áëà ãîäà ðþ!…
.…
ñýÃêñ çà èÃôó!…
.…
tnx for info!!…
.…
ñïñ çà èÃôó!…
.…
thanks!…
.…
ñýÃêñ çà èÃôó!!…
.…
good info!…
.…
ñýÃêñ çà èÃôó….
.…
ñïñ çà èÃôó….
.…
ñïà ñèáî çà èÃôó!!…
.…
ñïñ çà èÃôó….
.…
thanks for information!…
.…
good info….
.…
áëà ãîäà ðþ!!…
.…
good info!!…
.…
good!!…
.…
ñýÃêñ çà èÃôó….
.…
thanks!…
.…
tnx for info….
.…
ñïñ….
.…
áëà ãîäà ðñòâóþ!…
.…
ñïñ!!…
.…
ñïñ!!…
.…
tnx….
.…
ñïñ çà èÃôó….
.…
ñïà ñèáî çà èÃôó!…
.…
ñïñ….
.…
ñýÃêñ çà èÃôó….
.…
áëà ãîäà ðñòâóþ!!…
.…
good info!!…
.…
ñïñ!…
.…
áëà ãîäà ðñòâóþ!!…
.…
áëà ãîäà ðþ!!…
.…
áëà ãîäà ðñòâóþ!…
.…
áëà ãîäà ðñòâóþ!!…
.…
ñïñ….
.…
thanks….
.…
ñïñ!!…
.…
good info….
.…
tnx for info!…
.…
good!!…
.…
tnx for info!…
.…
ñïñ!…
.…
ñïà ñèáî!…
.…
ñïñ!…
.…
áëà ãîäà ðþ!!…
.…
ñïñ!…
.…
tnx….
.…
ñïñ çà èÃôó!!…
.…
thank you!…
.…
ñýÃêñ çà èÃôó!!…
.…
ñïñ!…
.…
ñïñ!…
.…
ñýÃêñ çà èÃôó!…
.…
ñïà ñèáî!!…
.…
ñïñ çà èÃôó!!…
.…
tnx!…
.…
áëà ãîäà ðåÅ.
.…
good!…
.…
tnx!…
.…
tnx for info!!…
.…
tnx for info!!…
.…
áëà ãîäà ðþ!!…
.…
good info!!…
.…
ñïà ñèáî çà èÃôó!…
.…
good info!!…
.…
tnx for info….
.…
thank you….
.…
ñïà ñèáî çà èÃôó….
.…
áëà ãîäà ðåÅ.
.…
good!!…
.…
thanks for information!…
.…
thank you!…
.…
ñïñ!…
.…
ñïñ….
.…
ñýÃêñ çà èÃôó….
.…
áëà ãîäà ðþ!…
.…
good info!…
.…
thanks!…
.…
áëà ãîäà ðåÃ!!…
.…
ñïà ñèáî çà èÃôó!!…
.…
áëà ãîäà ðåÃ!…
.…
áëà ãîäà ðåÅ.
.…
tnx for info!!…
.…
ñïñ….
.…
thank you!…
.…
áëà ãîäà ðåÃ!…
.…
áëà ãîäà ðåÃ!…
.…
tnx for info….
.…
ñïñ….
.…
ñýÃêñ çà èÃôó!!…
.…
ñïñ….
.…
tnx!!…
.…
ñïñ!…
.…
good info!!…
.…
tnx for info!!…
.…
tnx….
.…
áëà ãîäà ðñòâóþ!…
.…
áëà ãîäà ðñòâóþ!…
.…
ñïà ñèáî çà èÃôó!…
.…
thank you!!…
.…
ñïñ çà èÃôó!!…
.…
ñïñ!…
.…
ñýÃêñ çà èÃôó….
.…
áëà ãîäà ðåÃ!!…
.…
ñïà ñèáî çà èÃôó!…
.…
tnx for info….
.…
tnx!…
.…
thank you….
.…
thanks for information….
.…
áëà ãîäà ðåÃ!!…
.…
ñýÃêñ çà èÃôó!…
.…
ñýÃêñ çà èÃôó….
.…
ñïñ!…
.…
hello!…
.…
tnx for info….
.…
ñýÃêñ çà èÃôó….
.…
ñïà ñèáî!!…
.…
ñýÃêñ çà èÃôó!…
.…
good….
.…
good info!!…
.…
ñïà ñèáî çà èÃôó!!…
.…
áëà ãîäà ðñòâóþ….
.…
thanks for information!…
.…
tnx for info….
.…
ñïñ!…
.…
good!!…
.…
áëà ãîäà ðåÃ!!…
.…
tnx for info….
.…
good info….
.…
ñïà ñèáî!…
.…
ñïà ñèáî çà èÃôó!…
.…
ñïà ñèáî çà èÃôó….
.…
ñïñ!…
.…
ñïñ!…
.…
áëà ãîäà ðåÃ!!…
.…
ñýÃêñ çà èÃôó….
.…
ñïñ çà èÃôó!!…
.…
hello….
.…
áëà ãîäà ðñòâóþ!…
.…
ñïñ!…
.…
ñïñ çà èÃôó!…
.…
good!!…
.…
áëà ãîäà ðåÅ.
.…
tnx….
.…
thanks for information!…
.…
good….
.…
tnx for info….
.…
ñïà ñèáî çà èÃôó!!…
.…
tnx for info….
.…
good info!…
.…
ñïà ñèáî….
.…
hello….
.…
ñïñ….
.…
thanks….
.…
áëà ãîäà ðåÅ.
.…
ñïñ çà èÃôó!!…
.…
ñýÃêñ çà èÃôó!…
.…
áëà ãîäà ðñòâóþ!!…
.…
áëà ãîäà ðñòâóþ!…
.…
áëà ãîäà ðþ….
.…
ñïà ñèáî….
.…
ñïñ….
.…
thanks for information!…
.…
ñïñ çà èÃôó….
.…
tnx….
.…
thanks for information!!…
.…
ñýÃêñ çà èÃôó….
.…
thank you!!…
.…
hello….
.…
thanks….
.…
tnx for info!!…
.…
ñýÃêñ çà èÃôó!!…
.…
tnx for info!…
.…
áëà ãîäà ðåÅ.
.…
ñïñ çà èÃôó!!…
.…
ñýÃêñ çà èÃôó….
.…
ñýÃêñ çà èÃôó….
.…
ñïà ñèáî!!…
.…
thank you….
.…
ñïñ….
.…
hello….
.…
thanks….
.…
ñïà ñèáî!…
.…
tnx for info!!…
.…
ñïñ çà èÃôó….
.…
áëà ãîäà ðåÅ.
.…
tnx!!…
.…
ñïà ñèáî çà èÃôó!…
.…
ñïà ñèáî çà èÃôó!…
.…
ñïà ñèáî!!…
.…
thank you!…
.…
ñïñ!…
.…
thank you!…
.…
tnx for info….
.…
ñïñ çà èÃôó!!…
.…
ñïñ!!…
.…
ñïà ñèáî çà èÃôó!!…
.…
áëà ãîäà ðñòâóþ….
.…
áëà ãîäà ðåÃ!…
.…
ñïà ñèáî çà èÃôó!…
.…
ñïñ!…
.…
ñïñ!…
.…
áëà ãîäà ðåÃ!…
.…
ñïà ñèáî!…
.…
ñïñ!…
.…
thanks for information….
.…
thanks….
.…
ñïà ñèáî….
.…
ñïñ çà èÃôó!!…
.…
ñïà ñèáî çà èÃôó!!…
.…
ñïà ñèáî çà èÃôó!…
.…
tnx for info!…
.…
ñïà ñèáî çà èÃôó….
.…
ñýÃêñ çà èÃôó!…
.…
ñýÃêñ çà èÃôó!…
.…
ñýÃêñ çà èÃôó!…
.…
ñïñ!!…
.…
ñýÃêñ çà èÃôó….
.…
ñïñ çà èÃôó!…
.…
áëà ãîäà ðþ!…
.…
good….
.…
ñïñ!!…
.…
áëà ãîäà ðåÃ!!…
.…
ñïà ñèáî çà èÃôó….
.…
hello!…
.…
good!…
.…
ñïà ñèáî!…
.…
ñïñ!…
.…
ñïñ….
.…
ñïñ çà èÃôó!…
.…
thanks!!…
.…
áëà ãîäà ðñòâóþ!!…
.…
hello….
.…
ñýÃêñ çà èÃôó!…
.…
ñïà ñèáî çà èÃôó….
.…
thanks for information!…
.…
ñýÃêñ çà èÃôó!!…
.…
ñïà ñèáî!!…
.…
ñïà ñèáî!!…
.…
áëà ãîäà ðåÅ.
.…
thank you!…
.…
ñïà ñèáî çà èÃôó!…
.…
good!!…
.…
thank you….
.…
ñïñ çà èÃôó….
.…
ñïà ñèáî çà èÃôó….
.…
tnx!…
.…
tnx for info!…
.…
ñïà ñèáî çà èÃôó!…
.…
áëà ãîäà ðþ!…
.…
ñýÃêñ çà èÃôó!!…
.…
ñïà ñèáî çà èÃôó!!…
.…
good….
.…
ñïñ!…
.…
ñïà ñèáî….
.…
ñïñ çà èÃôó!…
.…
ñïñ….
.…
ñïñ çà èÃôó….
.…
áëà ãîäà ðþ….
.…
thanks….
.…
ñýÃêñ çà èÃôó….
.…
thanks for information!…
.…
good!!…
.…
ñýÃêñ çà èÃôó….
.…
tnx for info!…
.…
thanks!…
.…
tnx….
.…
ñïà ñèáî çà èÃôó!…
.…
ñýÃêñ çà èÃôó!!…
.…
ñïà ñèáî!!…
.…
good….
.…
ñïñ çà èÃôó….
.…
ñýÃêñ çà èÃôó!…
.…
tnx for info!!…
.…
ñýÃêñ çà èÃôó!!…
.…
ñïñ çà èÃôó!!…
.…
ñïñ!…
.…
good info!!…
.…
good info!…
.…
ñïà ñèáî çà èÃôó!…
.…
tnx!!…
.…
thanks for information….
.…
áëà ãîäà ðñòâóþ!!…
.…
áëà ãîäà ðñòâóþ!!…
.…
good info!…
.…
ñïñ çà èÃôó!!…
.…
tnx!…
.…
hello!…
.…
thanks!…
.…
ñïñ….
.…
áëà ãîäà ðþ….
.…
ñýÃêñ çà èÃôó!…
.…
good info!!…
.…
thanks….
.…
ñïñ!!…
.…
ñïñ çà èÃôó!!…
.…
ñýÃêñ çà èÃôó!…
.…
ñïñ çà èÃôó!!…
.…
thank you!!…
.…
tnx!…
.…
ñïñ çà èÃôó!!…
.…
thank you….
.…
áëà ãîäà ðñòâóþ!!…
.…
ñïà ñèáî çà èÃôó!!…
.…
ñïñ çà èÃôó!!…
.…
ñýÃêñ çà èÃôó!…
.…
good!…
.…
áëà ãîäà ðåÃ!!…
.…
tnx for info!…
.…
thank you….
.…
áëà ãîäà ðåÃ!…
.…
tnx for info!!…
.…
tnx for info!!…
.…
thank you….
.…
thanks!…
.…
tnx for info….
.…
ñïñ….
.…
ñýÃêñ çà èÃôó….
.…
ñïñ çà èÃôó!!…
.…
ñïñ çà èÃôó!…
.…
hello!!…
.…
good….
.…
thanks for information!…
.…
ñïñ….
.…
ñïñ çà èÃôó!…
.…
ñïñ!…
.…
áëà ãîäà ðþ!…
.…
thanks….
.…
tnx for info!…
.…
ñïà ñèáî çà èÃôó!…
.…
tnx!!…
.…
ñïà ñèáî çà èÃôó!…
.…
ñïà ñèáî!!…
.…
ñýÃêñ çà èÃôó….
.…
áëà ãîäà ðþ….
.…
ñïñ çà èÃôó!!…
.…
ñýÃêñ çà èÃôó….
.…
thanks for information!…
.…
good!!…
.…
ñýÃêñ çà èÃôó!!…
.…
hello!…
.…
good!!…
.…
ñïñ!…
.…
tnx!!…
.…
good….
.…
tnx for info….
.…
ñïñ çà èÃôó!!…
.…
ñýÃêñ çà èÃôó!…
.…
thanks for information….
.…
ñïñ….
.…
áëà ãîäà ðñòâóþ!!…
.…
ñïà ñèáî!…
.…
áëà ãîäà ðþ….
.…
ñýÃêñ çà èÃôó….
.…
good….
.…
ñïñ!…
.…
ñïà ñèáî çà èÃôó!…
.…
ñïà ñèáî çà èÃôó!…
.…
tnx….
.…
áëà ãîäà ðþ!…
.…
ñïñ çà èÃôó….
.…
áëà ãîäà ðåÃ!!…
.…
thanks….
.…
ñïñ!!…
.…
thanks for information!!…
.…
áëà ãîäà ðåÃ!!…
.…
thanks for information!…
.…
ñïñ!!…
.…
ñïà ñèáî çà èÃôó….
.…
áëà ãîäà ðþ….
.…
ñýÃêñ çà èÃôó!!…
.…
áëà ãîäà ðþ….
.…
tnx for info….
.…
ñïà ñèáî!!…
.…
ñïñ!!…
.…
ñïñ!…
.…
ñïà ñèáî çà èÃôó!…
.…
good info….
.…
tnx for info….
.…
tnx for info!…
.…
ñïà ñèáî çà èÃôó….
.…
good info!…
.…
ñïà ñèáî!…
.…
áëà ãîäà ðåÃ!!…
.…
ñýÃêñ çà èÃôó!!…
.…
ñïñ!…
.…
thanks for information!…
.…
tnx for info….
.…
tnx for info!…
.…
ñïñ çà èÃôó!…
.…
ñïñ!!…
.…
ñïñ çà èÃôó!!…
.…
thank you!…
.…
tnx….
.…
ñïà ñèáî çà èÃôó….
.…
good!…
.…
ñýÃêñ çà èÃôó!!…
.…
ñïñ çà èÃôó….
.…
ñýÃêñ çà èÃôó!…
.…
tnx for info….
.…
hello!!…
.…
ñïñ….
.…
ñïñ….
.…
ñïñ….
.…
áëà ãîäà ðñòâóþ!!…
.…
ñýÃêñ çà èÃôó!!…
.…
ñïñ çà èÃôó!…
.…
ñïñ çà èÃôó….
.…
good….
.…
ñýÃêñ çà èÃôó!!…
.…
tnx!!…
.…
good….
.…
áëà ãîäà ðþ!!…
.…
ñïñ!!…
.…
ñïñ!…
.…
ñïà ñèáî çà èÃôó!!…
.…
tnx for info!…
.…
áëà ãîäà ðñòâóþ!!…
.…
ñïñ!!…
.…
thanks….
.…
tnx for info….
.…
ñïñ….
.…
ñïà ñèáî….
.…
ñýÃêñ çà èÃôó!!…
.…
tnx!…
.…
thanks!!…
.…
tnx!!…
.…
ñïñ….
.…
áëà ãîäà ðþ….
.…
thanks!…
.…
ñïà ñèáî çà èÃôó!!…
.…
ñïñ!!…
.…
áëà ãîäà ðþ!…
.…
ñïñ çà èÃôó!…
.…
ñïñ çà èÃôó!…
.…
thanks….
.…
áëà ãîäà ðþ….
.…
ñýÃêñ çà èÃôó!!…
.…
áëà ãîäà ðåÃ!…
.…
ñïñ çà èÃôó!!…
.…
ñïñ çà èÃôó….
.…
ñïñ….
.…
ñïñ çà èÃôó….
.…
good info!!…
.…
ñïà ñèáî çà èÃôó!…
.…
ñïñ çà èÃôó!…
.…
ñïñ….
.…
ñïñ!…
.…
tnx….
.…
ñïñ!!…
.…
ñïñ….
.…
ñïñ!…
.…
ñïñ çà èÃôó!!…
.…
thanks!!…
.…
ñýÃêñ çà èÃôó….
.…
ñïà ñèáî çà èÃôó!…
.…
tnx for info!…
.…
ñïñ….
.…
ñýÃêñ çà èÃôó….
.…
ñïñ….
.…
thank you!!…
.…
áëà ãîäà ðåÃ!!…
.…
tnx for info….
.…
ñïà ñèáî çà èÃôó!…
.…
thanks for information….
.…
áëà ãîäà ðåÅ.
.…
ñïñ….
.…
áëà ãîäà ðþ….
.…
ñïñ çà èÃôó!!…
.…
good info….
.…
ñïà ñèáî çà èÃôó!…
.…
ñïñ çà èÃôó!!…
.…
thanks!…
.…
tnx for info!!…
.…
thanks….
.…
ñïñ!!…
.…
ñïà ñèáî!!…
.…
tnx!!…
.…
ñïà ñèáî çà èÃôó!…
.…
tnx for info….
.…
ñïà ñèáî çà èÃôó!…
.…
good!…
.…
ñýÃêñ çà èÃôó!!…
.…
ñïà ñèáî çà èÃôó!…
.…
áëà ãîäà ðñòâóþ….
.…
good….
.…
tnx for info!…
.…
thank you!!…
.…
thanks for information….
.…
ñïà ñèáî çà èÃôó!…
.…
ñïñ!…
.…
thank you….
.…
tnx for info!!…
.…
áëà ãîäà ðþ!!…
.…
thanks for information….
.…
áëà ãîäà ðåÅ.
.…
ñïñ….
.…
tnx for info….
.…
ñïà ñèáî çà èÃôó!!…
.…
thank you!…
.…
ñïñ!!…
.…
ñïñ!…
.…
áëà ãîäà ðåÅ.
.…
ñïñ….
.…
good!!…
.…
thanks for information….
.…
ñïà ñèáî çà èÃôó!…
.…
ñïñ….
.…
hello!…
.…
ñïà ñèáî çà èÃôó!!…
.…
ñïñ!…
.…
ñïñ çà èÃôó….
.…
tnx….
.…
ñïà ñèáî….
.…
good!!…
.…
good info!…
.…
thanks….
.…
thanks!…
.…
tnx!!…
.…
ñïñ çà èÃôó!!…
.…
ñïñ….
.…
áëà ãîäà ðåÅ.
.…
good info!…
.…
ñïà ñèáî!!…
.…
ñïñ çà èÃôó….
.…
good….
.…
ñýÃêñ çà èÃôó!!…
.…
ñýÃêñ çà èÃôó!!…
.…
good….
.…
thanks!!…
.…
ñýÃêñ çà èÃôó….
.…
thank you….
.…
ñïñ!!…
.…
thanks for information!!…
.…
thanks!…
.…
thank you!!…
.…
thanks for information!…
.…
ñïà ñèáî çà èÃôó!…
.…
ñïñ!!…
.…
áëà ãîäà ðþ….
.…
ñýÃêñ çà èÃôó!…
.…
tnx!…
.…
good!!…
.…
tnx for info!!…
.…
hello….
.…
good….
.…
ñïà ñèáî çà èÃôó!!…
.…
ñïñ!…
.…
ñýÃêñ çà èÃôó!!…
.…
ñïà ñèáî!…
.…
áëà ãîäà ðåÅ.
.…
good!!…
.…
hello!…
.…
tnx for info!…
.…
ñïñ çà èÃôó….
.…
ñïñ!!…
.…
áëà ãîäà ðþ!!…
.…
thanks for information….
.…
ñïà ñèáî çà èÃôó!!…
.…
ñïñ çà èÃôó….
.…
ñïà ñèáî çà èÃôó!!…
.…
áëà ãîäà ðþ….
.…
tnx for info!!…
.…
áëà ãîäà ðþ….
.…
ñïñ çà èÃôó!!…
.…
thanks!…
.…
ñïñ!!…
.…
good!…
.…
ñïñ çà èÃôó!…
.…
ñïñ çà èÃôó!…
.…
thanks for information!…
.…
ñïà ñèáî!…
.…
ñïñ!…
.…
ñïñ çà èÃôó!…
.…
thanks!…
.…
thanks for information….
.…
good info!!…
.…
ñýÃêñ çà èÃôó….
.…
thank you….
.…
thanks!!…
.…
áëà ãîäà ðþ….
.…
thanks!…
.…
tnx for info!!…
.…
ñýÃêñ çà èÃôó!!…
.…
áëà ãîäà ðñòâóþ!…
.…
thanks for information….
.…
ñïñ!!…
.…
ñïñ!…
.…
thanks for information!…
.…
thank you!!…
.…
ñïñ çà èÃôó!…
.…
ñïñ….
.…
ñïñ çà èÃôó!!…
.…
good….
.…
thank you….
.…
good info….
.…
ñïñ çà èÃôó….
.…
ñïà ñèáî!…
.…
áëà ãîäà ðåÃ!…
.…
thank you!!…
.…
good!!…
.…
thank you….
.…
ñýÃêñ çà èÃôó….
.…
thanks….
.…
ñïà ñèáî çà èÃôó!…
.…
áëà ãîäà ðåÃ!…
.…
áëà ãîäà ðåÃ!…
.…
ñïñ!…
.…
ñïñ çà èÃôó!!…
.…
thanks for information!!…
.…
ñýÃêñ çà èÃôó!…
.…
ñïñ çà èÃôó….
.…
ñïà ñèáî çà èÃôó!…
.…
ñïñ çà èÃôó….
.…
áëà ãîäà ðåÃ!!…
.…
ñïñ!!…
.…
áëà ãîäà ðåÃ!!…
.…
ñïà ñèáî çà èÃôó!!…
.…
ñïñ çà èÃôó!!…
.…
ñïà ñèáî çà èÃôó….
.…
ñýÃêñ çà èÃôó!!…
.…
thank you!!…
.…
ñýÃêñ çà èÃôó!!…
.…
áëà ãîäà ðñòâóþ….
.…
ñïñ çà èÃôó!!…
.…
tnx for info!!…
.…
áëà ãîäà ðåÅ.
.…
hello!!…
.…
áëà ãîäà ðñòâóþ….
.…
ñïà ñèáî çà èÃôó….
.…
áëà ãîäà ðþ!…
.…
ñïà ñèáî çà èÃôó!!…
.…
hello!!…
.…
good!!…
.…
ñïà ñèáî!…
.…
ñïà ñèáî çà èÃôó!…
.…
thank you….
.…
hello….
.…
ñýÃêñ çà èÃôó!…
.…
áëà ãîäà ðåÃ!!…
.…
thank you!…
.…
ñïñ!!…
.…
ñïñ….
.…
ñïñ çà èÃôó….
.…
ñïà ñèáî çà èÃôó!…
.…
ñïà ñèáî çà èÃôó!…
.…
thank you….
.…
thank you!!…
.…
áëà ãîäà ðþ!…
.…
ñïñ!!…
.…
ñïñ çà èÃôó!…
.…
good info!…
.…
ñýÃêñ çà èÃôó!…
.…
ñïà ñèáî çà èÃôó….
.…
áëà ãîäà ðåÃ!!…
.…
ñïà ñèáî çà èÃôó!!…
.…
ñïñ!…
.…
áëà ãîäà ðñòâóþ!…
.…
áëà ãîäà ðþ!…
.…
ñýÃêñ çà èÃôó!…
.…
tnx for info!!…
.…
ñïà ñèáî çà èÃôó….
.…
tnx for info!!…
.…
good!!…
.…
good info….
.…
ñïñ!…
.…
ñïñ çà èÃôó!!…
.…
ñïñ!!…
.…
thank you!!…
.…
thanks!!…
.…
thank you!…
.…
ñýÃêñ çà èÃôó!…
.…
good info!!…
.…
ñïñ!…
.…
áëà ãîäà ðþ!!…
.…
ñïñ….
.…
tnx!!…
.…
thanks….
.…
ñïà ñèáî çà èÃôó!…
.…
ñïà ñèáî….
.…
áëà ãîäà ðåÅ.
.…
ñïñ çà èÃôó!…
.…
áëà ãîäà ðåÅ.
.…
ñïñ!…
.…
tnx for info!…
.…
ñïà ñèáî….
.…
thanks….
.…
good….
.…
tnx for info….
.…
ñïà ñèáî çà èÃôó!…
.…
ñïñ!…
.…
hello….
.…
ñïñ!…
.…
thank you!…
.…
good!!…
.…
tnx for info….
.…
tnx for info!!…
.…
ñýÃêñ çà èÃôó….
.…
tnx for info!…
.…
ñïñ çà èÃôó!!…
.…
tnx for info!…
.…
ñýÃêñ çà èÃôó….
.…
ñýÃêñ çà èÃôó!…
.…
thanks!!…
.…
tnx for info….
.…
thanks for information….
.…
good!!…
.…
ñïà ñèáî….
.…
áëà ãîäà ðñòâóþ….
.…
áëà ãîäà ðñòâóþ….
.…
ñïà ñèáî çà èÃôó….
.…
thanks!…
.…
áëà ãîäà ðåÅ.
.…
thanks for information!…
.…
áëà ãîäà ðñòâóþ!…
.…
ñïà ñèáî….
.…
ñïà ñèáî!!…
.…
áëà ãîäà ðþ!…
.…
hello!…
.…
áëà ãîäà ðþ….
.…
áëà ãîäà ðñòâóþ!!…
.…
ñïà ñèáî çà èÃôó!…
.…
ñïñ!!…
.…
áëà ãîäà ðñòâóþ….
.…
thanks!…
.…
ñýÃêñ çà èÃôó!…
.…
good info….
.…
thank you….
.…
thanks for information!…
.…
áëà ãîäà ðñòâóþ….
.…
ñïà ñèáî….
.…
tnx for info!…
.…
áëà ãîäà ðþ!!…
.…
tnx for info….
.…
good….
.…
ñïñ çà èÃôó!!…
.…
thank you!!…
.…
ñïñ….
.…
thanks for information!…
.…
thank you!…
.…
thanks for information!…
.…
ñïñ….
.…
áëà ãîäà ðñòâóþ!!…
.…
ñïñ….
.…
thanks!…
.…
ñïñ!…
.…
tnx….
.…
ñïà ñèáî çà èÃôó….
.…
thank you….
.…
thanks for information!…
.…
tnx for info!!…
.…
áëà ãîäà ðþ….
.…
ñïñ….
.…
good!!…
.…
thank you!!…
.…
tnx for info….
.…
good info….
.…
thanks for information….
.…
tnx for info!…
.…
ñýÃêñ çà èÃôó….
.…
thanks!…
.…
ñïñ!…
.…
tnx!…
.…
ñïñ!!…
.…
thanks!…
.…
ñïñ çà èÃôó….
.…
ñïà ñèáî çà èÃôó….
.…
ñïà ñèáî!!…
.…
ñýÃêñ çà èÃôó!!…
.…
good….
.…
áëà ãîäà ðþ….
.…
thanks!…
.…
tnx for info!!…
.…
ñïà ñèáî!…
.…
ñýÃêñ çà èÃôó!!…
.…
thanks for information….
.…
ñïà ñèáî çà èÃôó….
.…
áëà ãîäà ðåÅ.
.…
tnx….
.…
good!…
.…
thanks!!…
.…
thank you!…
.…
good!!…
.…
ñïñ!!…
.…
ñýÃêñ çà èÃôó….
.…
ñýÃêñ çà èÃôó….
.…
áëà ãîäà ðåÃ!…
.…
ñïà ñèáî!!…
.…
ñïñ!!…
.…
hello!…
.…
ñïñ çà èÃôó….
.…
tnx for info!…
.…
hello….
.…
ñïñ!!…
.…
thanks for information….
.…
ñïñ!!…
.…
ñýÃêñ çà èÃôó!…
.…
ñýÃêñ çà èÃôó!…
.…
tnx for info….
.…
ñïñ çà èÃôó….
.…
ñýÃêñ çà èÃôó….
.…
ñýÃêñ çà èÃôó!…
.…
thanks for information….
.…
tnx for info!!…
.…
ñïñ….
.…
ñïñ!!…
.…
ñïñ!…
.…
thanks!!…
.…
ñýÃêñ çà èÃôó….
.…
ñïñ çà èÃôó….
.…
ñïñ!!…
.…
good info….
.…
ñýÃêñ çà èÃôó….
.…
tnx!!…
.…
thanks for information….
.…
thanks for information!!…
.…
ñïñ….
.…
áëà ãîäà ðåÃ!!…
.…
ñïñ çà èÃôó….
.…
tnx for info!!…
.…
ñïñ!…
.…
tnx for info!…
.…
ñïñ….
.…
ñïà ñèáî çà èÃôó!!…
.…
ñïñ!…
.…
tnx!!…
.…
ñïà ñèáî çà èÃôó!!…
.…
ñïñ….
.…
ñïñ çà èÃôó!!…
.…
ñïñ çà èÃôó….
.…
ñïà ñèáî çà èÃôó!!…
.…
good!…
.…
ñïñ çà èÃôó!…
.…
áëà ãîäà ðñòâóþ!!…
.…
good info!!…
.…
tnx for info!!…
.…
thanks for information!!…
.…
ñïñ!…
.…
áëà ãîäà ðþ!!…
.…
ñïà ñèáî çà èÃôó!!…
.…
ñýÃêñ çà èÃôó….
.…
ñïñ çà èÃôó!!…
.…
ñïñ!…
.…
tnx….
.…
thanks!!…
.…
áëà ãîäà ðþ….
.…
ñïà ñèáî çà èÃôó!!…
.…
áëà ãîäà ðñòâóþ!!…
.…
áëà ãîäà ðñòâóþ….
.…
ñïà ñèáî çà èÃôó!!…
.…
ñïñ!!…
.…
áëà ãîäà ðåÅ.
.…
tnx for info….
.…
hello!…
.…
ñïñ çà èÃôó….
.…
ñïñ çà èÃôó!…
.…
thanks for information!…
.…
ñïñ….
.…
tnx….
.…
ñýÃêñ çà èÃôó!…
.…
áëà ãîäà ðþ!!…
.…
tnx for info!!…
.…
thanks for information!!…
.…
tnx for info!!…
.…
tnx for info!!…
.…
thanks for information!!…
.…
good info!!…
.…
tnx for info….
.…
ñýÃêñ çà èÃôó!…
.…
ñïñ çà èÃôó!!…
.…
ñïà ñèáî!…
.…
thanks for information….
.…
ñïñ!!…
.…
ñýÃêñ çà èÃôó….
.…
ñïñ çà èÃôó!…
.…
thanks!…
.…
good info!…
.…
thanks….
.…
ñïà ñèáî çà èÃôó!…
.…
ñïñ çà èÃôó!!…
.…
ñïà ñèáî!…
.…
ñýÃêñ çà èÃôó!!…
.…
áëà ãîäà ðåÃ!…
.…
ñïà ñèáî çà èÃôó….
.…
ñýÃêñ çà èÃôó….
.…
tnx….
.…
thank you….
.…
tnx….
.…
thank you!…
.…
áëà ãîäà ðåÃ!!…
.…
good info!…
.…
ñïñ çà èÃôó!…
.…
áëà ãîäà ðþ!!…
.…
ñïñ!!…
.…
ñýÃêñ çà èÃôó….
.…
tnx for info!!…
.…
ñýÃêñ çà èÃôó!…
.…
ñýÃêñ çà èÃôó!…
.…
ñïñ!…
.…
ñïñ çà èÃôó….
.…
hello!…
.…
tnx for info!…
.…
hello!!…
.…
thank you!…
.…
tnx for info!!…
.…
tnx for info!!…
.…
ñïà ñèáî çà èÃôó!!…
.…
tnx!…
.…
áëà ãîäà ðåÃ!!…
.…
ñïñ çà èÃôó!!…
.…
tnx for info!…
.…
thank you….
.…
ñïà ñèáî!!…
.…
tnx for info!!…
.…
hello….
.…
ñïñ!!…
.…
ñïñ çà èÃôó!…
.…
áëà ãîäà ðñòâóþ!…
.…
ñïñ çà èÃôó!!…
.…
ñïà ñèáî çà èÃôó….
.…
ñïà ñèáî çà èÃôó!!…
.…
thanks….
.…
ñýÃêñ çà èÃôó!!…
.…
ñïñ….
.…
tnx for info….
.…
good….
.…
ñïñ!!…
.…
áëà ãîäà ðþ….
.…
hello!!…
.…
good info….
.…
ñïñ çà èÃôó….
.…
ñïà ñèáî çà èÃôó….
.…
ñïà ñèáî!…
.…
áëà ãîäà ðñòâóþ….
.…
ñïà ñèáî!…
.…
ñïà ñèáî çà èÃôó!…
.…
áëà ãîäà ðþ!!…
.…
hello!!…
.…
thank you!!…
.…
áëà ãîäà ðåÃ!!…
.…
ñïñ!!…
.…
tnx….
.…
thanks!!…
.…
áëà ãîäà ðñòâóþ!…
.…
ñïñ!!…
.…
áëà ãîäà ðþ!!…
.…
ñïñ!!…
.…
thanks for information!…
.…
good!!…
.…
tnx for info….
.…
ñïñ çà èÃôó!…
.…
áëà ãîäà ðñòâóþ….
.…
ñïñ!…
.…
hello!!…
.…
tnx for info!!…
.…
thank you!!…
.…
thanks….
.…
tnx for info!…
.…
tnx for info!!…
.…
tnx for info!…
.…
ñïñ!!…
.…
ñïà ñèáî çà èÃôó….
.…
tnx for info!!…
.…
ñïà ñèáî çà èÃôó!…
.…
tnx for info….
.…
ñïñ….
.…
ñïà ñèáî çà èÃôó!…
.…
áëà ãîäà ðåÃ!…
.…
ñýÃêñ çà èÃôó!…
.…
ñïñ!!…
.…
áëà ãîäà ðñòâóþ!!…
.…
thanks!…
.…
thanks for information!!…
.…
ñïñ!…
.…
ñïñ çà èÃôó….
.…
ñïñ….
.…
ñýÃêñ çà èÃôó!!…
.…
good!!…
.…
ñïà ñèáî çà èÃôó….
.…
ñïñ!…
.…
ñïñ!…
.…
ñïà ñèáî çà èÃôó….
.…
hello!…
.…
ñýÃêñ çà èÃôó!…
.…
áëà ãîäà ðåÅ.
.…
tnx for info!…
.…
good!!…
.…
ñïà ñèáî çà èÃôó….
.…
ñïñ!…
.…
ñýÃêñ çà èÃôó….
.…
ñïñ çà èÃôó!…
.…
ñïñ çà èÃôó….
.…
good info!…
.…
ñïà ñèáî çà èÃôó!!…
.…
áëà ãîäà ðþ!!…
.…
tnx for info!…
.…
ñýÃêñ çà èÃôó!!…
.…
ñïà ñèáî çà èÃôó….
.…
áëà ãîäà ðåÅ.
.…
tnx for info!!…
.…
ñïñ çà èÃôó….
.…
ñïà ñèáî çà èÃôó!!…
.…
hello….
.…
good info….
.…
ñïñ….
.…
ñïñ çà èÃôó!…
.…
ñïñ….
.…
ñïñ çà èÃôó!…
.…
ñïà ñèáî!!…
.…
ñïñ çà èÃôó….
.…
good info!!…
.…
tnx for info!!…
.…
áëà ãîäà ðåÃ!!…
.…
ñïñ….
.…
ñïà ñèáî!…
.…
áëà ãîäà ðþ!!…
.…
hello!…
.…
ñïà ñèáî çà èÃôó….
.…
ñýÃêñ çà èÃôó!…
.…
áëà ãîäà ðþ….
.…
tnx for info!!…
.…
ñïà ñèáî çà èÃôó….
.…
ñïñ!…
.…
good!…
.…
ñïñ!!…
.…
good info….
.…
ñïà ñèáî!!…
.…
ñýÃêñ çà èÃôó!!…
.…
ñýÃêñ çà èÃôó!!…
.…
ñïñ!!…
.…
ñýÃêñ çà èÃôó!…
.…
áëà ãîäà ðñòâóþ!…
.…
ñïñ!…
.…
hello!…
.…
ñïñ çà èÃôó!…
.…
good info!!…
.…
thanks!…
.…
thanks….
.…
thanks for information!!…
.…
áëà ãîäà ðñòâóþ….
.…
ñïà ñèáî çà èÃôó!!…
.…
thanks for information!!…
.…
tnx for info….
.…
thank you!…
.…
ñïà ñèáî çà èÃôó….
.…
tnx for info….
.…
ñïñ çà èÃôó!…
.…
ñïñ çà èÃôó!…
.…
ñïñ….
.…
ñïà ñèáî!…
.…
áëà ãîäà ðþ….
.…
thanks!…
.…
ñïà ñèáî çà èÃôó!!…
.…
ñïà ñèáî çà èÃôó!!…
.…
tnx for info….
.…
tnx for info!…
.…
ñýÃêñ çà èÃôó….
.…
ñïà ñèáî….
.…
ñïñ çà èÃôó!…
.…
good!…
.…
good….
.…
ñïñ….
.…
áëà ãîäà ðåÃ!!…
.…
tnx….
.…
ñïñ!!…
.…
ñýÃêñ çà èÃôó!…
.…
good info….
.…
thanks for information!…
.…
ñïà ñèáî çà èÃôó….
.…
tnx for info!!…
.…
hello!!…
.…
ñïà ñèáî!…
.…
ñïà ñèáî çà èÃôó!!…
.…
tnx….
.…
tnx for info!!…
.…
áëà ãîäà ðåÃ!!…
.…
ñïñ!!…
.…
ñýÃêñ çà èÃôó!!…
.…
ñïà ñèáî çà èÃôó!…
.…
thanks!!…
.…
ñïñ!…
.…
hello….
.…
thank you….
.…
ñïà ñèáî çà èÃôó!…
.…
thanks for information!!…
.…
tnx for info!!…
.…
ñïñ….
.…
áëà ãîäà ðåÃ!…
.…
ñïà ñèáî!…
.…
áëà ãîäà ðþ!!…
.…
ñïñ!!…
.…
tnx for info….
.…
thank you!…
.…
tnx!…
.…
ñýÃêñ çà èÃôó!!…
.…
ñïñ çà èÃôó!!…
.…
thank you….
.…
ñïñ!…
.…
good info!!…
.…
ñýÃêñ çà èÃôó!!…
.…
ñïñ çà èÃôó!…
.…
ñýÃêñ çà èÃôó….
.…
ñýÃêñ çà èÃôó!!…
.…
tnx for info….
.…
ñïà ñèáî çà èÃôó!…
.…
thank you….
.…
ñïñ!…
.…
ñýÃêñ çà èÃôó!…
.…
tnx for info!!…
.…
ñýÃêñ çà èÃôó!!…
.…
ñïñ!…
.…
thanks for information!!…
.…
thank you!…
.…
tnx….
.…
ñïà ñèáî çà èÃôó….
.…
ñïñ çà èÃôó!…
.…
good info!…
.…
ñïñ!…
.…
ñïñ çà èÃôó!!…
.…
tnx for info….
.…
thanks for information!!…
.…
áëà ãîäà ðñòâóþ….
.…
ñïñ!!…
.…
áëà ãîäà ðñòâóþ!!…
.…
thank you!…
.…
ñýÃêñ çà èÃôó!…
.…
ñïà ñèáî çà èÃôó….
.…
áëà ãîäà ðåÅ.
.…
áëà ãîäà ðþ!…
.…
áëà ãîäà ðñòâóþ….
.…
ñïà ñèáî çà èÃôó….
.…
ñïñ!…
.…
thanks for information!!…
.…
ñïà ñèáî çà èÃôó!!…
.…
ñïñ çà èÃôó!…
.…
ñïñ çà èÃôó!!…
.…
ñïñ çà èÃôó….
.…
ñïà ñèáî!…
.…
thanks….
.…
ñïñ!…
.…
áëà ãîäà ðåÃ!…
.…
thank you!!…
.…
áëà ãîäà ðåÃ!…
.…
good info!…
.…
ñýÃêñ çà èÃôó!!…
.…
ñïñ….
.…
good info….
.…
good!…
.…
thank you!!…
.…
ñïà ñèáî!!…
.…
ñïñ….
.…
tnx….
.…
áëà ãîäà ðñòâóþ!…
.…
ñýÃêñ çà èÃôó….
.…
thanks for information!!…
.…
áëà ãîäà ðþ….
.…
áëà ãîäà ðñòâóþ!!…
.…
thank you!…
.…
áëà ãîäà ðþ….
.…
ñïñ!!…
.…
thanks!…
.…
ñïñ çà èÃôó!…
.…
thanks!…
.…
thanks!!…
.…
thanks!…
.…
thanks for information….
.…
hello….
.…
thanks for information….
.…
thanks!!…
.…
áëà ãîäà ðåÃ!…
.…
ñïñ!…
.…
hello!…
.…
thanks for information….
.…
thanks for information!…
.…
ñïñ çà èÃôó….
.…
ñýÃêñ çà èÃôó….
.…
thank you!!…
.…
tnx for info!…
.…
thanks for information….
.…
tnx for info….
.…
thank you!!…
.…
ñýÃêñ çà èÃôó!!…
.…
ñïñ çà èÃôó!!…
.…
ñïà ñèáî çà èÃôó!!…
.…
hello….
.…
ñïà ñèáî!!…
.…
ñïà ñèáî!!…
.…
ñïñ….
.…
ñïà ñèáî çà èÃôó….
.…
tnx for info!…
.…
áëà ãîäà ðåÃ!…
.…
ñïñ….
.…
ñýÃêñ çà èÃôó….
.…
tnx for info….
.…
good….
.…
tnx for info!…
.…
tnx for info!…
.…
ñïñ….
.…
tnx….
.…
tnx for info….
.…
thank you!…
.…
tnx!…
.…
ñïñ çà èÃôó!…
.…
tnx for info!!…
.…
ñïñ çà èÃôó….
.…
ñïà ñèáî çà èÃôó….
.…
good info!!…
.…
tnx!…
.…
ñïà ñèáî….
.…
ñïñ….
.…
ñïñ….
.…
tnx for info!!…
.…
ñïñ….
.…
ñïñ!…
.…
ñïà ñèáî çà èÃôó….
.…
ñïñ!…
.…
ñïñ çà èÃôó….
.…
áëà ãîäà ðåÃ!!…
.…
ñïñ çà èÃôó!…
.…
thank you….
.…
thanks….
.…
good info….
.…
hello!!…
.…
ñïñ!…
.…
ñïñ!!…
.…
ñýÃêñ çà èÃôó….
.…
ñýÃêñ çà èÃôó….
.…
hello!…
.…
hello!…
.…
tnx for info!!…
.…
ñïñ!!…
.…
good….
.…
thanks for information….
.…
ñïñ!…
.…
ñïñ!…
.…
ñïà ñèáî!!…
.…
ñýÃêñ çà èÃôó….
.…
ñïñ!…
.…
good!…
.…
tnx!!…
.…
good info!…
.…
ñïà ñèáî….
.…
ñýÃêñ çà èÃôó!…
.…
ñïà ñèáî!…
.…
ñïñ!!…
.…
áëà ãîäà ðåÃ!…
.…
ñýÃêñ çà èÃôó!!…
.…
thank you!…
.…
good!!…
.…
ñïñ çà èÃôó!!…
.…
ñïà ñèáî!!…
.…
ñïñ!…
.…
ñïà ñèáî!…
.…
ñïñ!…
.…
tnx for info!…
.…
ñïñ çà èÃôó!!…
.…
good!…
.…
thank you!…
.…
ñïñ!!…
.…
áëà ãîäà ðåÅ.
.…
ñïñ!…
.…
ñïñ çà èÃôó….
.…
ñïñ….
.…
ñýÃêñ çà èÃôó!!…
.…
ñïà ñèáî çà èÃôó….
.…
áëà ãîäà ðþ….
.…
áëà ãîäà ðåÃ!!…
.…
ñïñ!…
.…
ñýÃêñ çà èÃôó!!…
.…
tnx for info!…
.…
ñïñ!!…
.…
ñýÃêñ çà èÃôó!…
.…
ñïñ….
.…
áëà ãîäà ðñòâóþ!…
.…
ñïà ñèáî….
.…
ñïà ñèáî çà èÃôó!…
.…
ñïñ!…
.…
thank you!…
.…
ñïñ!!…
.…
ñïà ñèáî çà èÃôó!!…
.…
ñïñ çà èÃôó….
.…
tnx!…
.…
áëà ãîäà ðñòâóþ!…
.…
ñýÃêñ çà èÃôó….
.…
ñïñ çà èÃôó!!…
.…
ñïà ñèáî çà èÃôó….
.…
ñïñ çà èÃôó!!…
.…
hello!!…
.…
thank you!…
.…
ñïñ çà èÃôó!!…
.…
ñïñ çà èÃôó!…
.…
ñïñ çà èÃôó!!…
.…
ñïà ñèáî çà èÃôó….
.…
thanks for information….
.…
ñïñ!!…
.…
ñïñ çà èÃôó!!…
.…
ñýÃêñ çà èÃôó!…
.…
ñïñ çà èÃôó!!…
.…
tnx….
.…
good info….
.…
ñïñ çà èÃôó….
.…
ñïñ….
.…
ñïñ çà èÃôó!…
.…
áëà ãîäà ðñòâóþ!!…
.…
ñïà ñèáî çà èÃôó!…
.…
ñïñ….
.…
ñïà ñèáî!…
.…
áëà ãîäà ðþ….
.…
ñïñ!!…
.…
ñïñ çà èÃôó!…
.…
tnx….
.…
ñýÃêñ çà èÃôó!!…
.…
ñïñ çà èÃôó!…
.…
ñïñ çà èÃôó!…
.…
ñïñ çà èÃôó!!…
.…
good….
.…
áëà ãîäà ðþ….
.…
ñïñ!!…
.…
thanks for information!!…
.…
tnx for info!…
.…
good!!…
.…
ñïñ!!…
.…
thanks for information!…
.…
áëà ãîäà ðåÃ!…
.…
ñïñ çà èÃôó!…
.…
ñïñ!…
.…
ñïà ñèáî çà èÃôó!!…
.…
áëà ãîäà ðñòâóþ….
.…
ñïñ!…
.…
ñïñ….
.…
thank you….
.…
ñïñ….
.…
hello….
.…
ñýÃêñ çà èÃôó!…
.…
tnx for info!…
.…
hello!…
.…
ñïñ çà èÃôó….
.…
áëà ãîäà ðþ!…
.…
áëà ãîäà ðñòâóþ….
.…
ñïñ….
.…
áëà ãîäà ðåÃ!…
.…
thanks!…
.…
good info!!…
.…
good….
.…
ñïñ….
.…
ñïñ çà èÃôó….
.…
ñïà ñèáî çà èÃôó!…
.…
thanks for information….
.…
thanks for information!…
.…
tnx!…
.…
thanks for information!…
.…
good info….
.…
ñýÃêñ çà èÃôó!!…
.…
thank you!…
.…
good….
.…
tnx….
.…
hello….
.…
thanks….
.…
thanks!!…
.…
thanks for information!!…
.…
tnx for info….
.…
ñïñ çà èÃôó….
.…
ñïñ çà èÃôó….
.…
ñýÃêñ çà èÃôó….
.…
ñïà ñèáî çà èÃôó!…
.…
ñïñ!…
.…
ñïà ñèáî çà èÃôó!…
.…
hello!!…
.…
tnx for info….
.…
áëà ãîäà ðþ!…
.…
good!!…
.…
hello!!…
.…
áëà ãîäà ðñòâóþ!…
.…
ñïà ñèáî çà èÃôó….
.…
ñïñ!!…
.…
ñýÃêñ çà èÃôó….
.…
tnx for info!…
.…
áëà ãîäà ðñòâóþ….
.…
ñïà ñèáî çà èÃôó!!…
.…
thanks for information!…
.…
ñïà ñèáî çà èÃôó….
.…
hello….
.…
ñïñ!…
.…
ñýÃêñ çà èÃôó!…
.…
good info!!…
.…
áëà ãîäà ðñòâóþ!…
.…
thank you….
.…
thanks for information!!…
.…
thank you!!…
.…
ñïñ çà èÃôó….
.…
thank you!!…
.…
ñýÃêñ çà èÃôó!!…
.…
ñïñ!…
.…
ñïñ!…
.…
thanks!!…
.…
áëà ãîäà ðñòâóþ….
.…
ñïñ!!…
.…
tnx….
.…
ñïñ çà èÃôó!!…
.…
tnx for info!!…
.…
ñïñ!!…
.…
ñïñ çà èÃôó….
.…
tnx….
.…
tnx for info!!…
.…
áëà ãîäà ðñòâóþ!!…
.…
ñïñ!!…
.…
tnx!…
.…
ñïà ñèáî!!…
.…
ñïà ñèáî!!…
.…
ñïñ….
.…
thanks!!…
.…
good info!!…
.…
ñïà ñèáî çà èÃôó!…
.…
thanks for information!!…
.…
ñïñ!…
.…
ñýÃêñ çà èÃôó!!…
.…
ñïñ….
.…
ñïñ çà èÃôó!…
.…
áëà ãîäà ðñòâóþ!!…
.…
ñïà ñèáî çà èÃôó….
.…
ñïñ….
.…
ñïñ!!…
.…
tnx!…
.…
tnx!!…
.…
good info….
.…
áëà ãîäà ðåÅ.
.…
thanks!!…
.…
ñïà ñèáî çà èÃôó!!…
.…
tnx!…
.…
thank you….
.…
tnx!!…
.…
ñïà ñèáî çà èÃôó….
.…
thanks for information!!…
.…
thank you!!…
.…
thanks for information!…
.…
áëà ãîäà ðþ!!…
.…
tnx….
.…
ñïà ñèáî çà èÃôó!!…
.…
thanks for information!…
.…
ñïñ çà èÃôó!!…
.…
ñýÃêñ çà èÃôó….
.…
áëà ãîäà ðåÃ!!…
.…
ñïñ çà èÃôó!…
.…
thanks!…
.…
hello!…
.…
thanks….
.…
tnx!…
.…
tnx for info!!…
.…
hello!!…
.…
ñïñ çà èÃôó!…
.…
good info!…
.…
ñýÃêñ çà èÃôó!…
.…
ñïà ñèáî çà èÃôó….
.…
áëà ãîäà ðåÃ!!…
.…
tnx for info!…
.…
good info!!…
.…
áëà ãîäà ðþ!…
.…
ñïñ çà èÃôó!!…
.…
thank you!…
.…
ñýÃêñ çà èÃôó!…
.…
áëà ãîäà ðåÃ!!…
.…
áëà ãîäà ðñòâóþ….
.…
good….
.…
ñïà ñèáî çà èÃôó….
.…
ñýÃêñ çà èÃôó!!…
.…
good info….
.…
thanks….
.…
ñïà ñèáî çà èÃôó!!…
.…
good….
.…
tnx for info….
.…
thank you!…
.…
thanks….
.…
tnx for info!!…
.…
hello!!…
.…
áëà ãîäà ðåÃ!…
.…
tnx for info….
.…
ñýÃêñ çà èÃôó!…
.…
áëà ãîäà ðþ!!…
.…
ñýÃêñ çà èÃôó!…
.…
tnx!…
.…
ñïñ….
.…
ñïà ñèáî çà èÃôó….
.…
áëà ãîäà ðñòâóþ!!…
.…
ñïñ çà èÃôó….
.…
ñïñ!!…
.…
áëà ãîäà ðñòâóþ….
.…
ñýÃêñ çà èÃôó!…
.…
áëà ãîäà ðåÅ.
.…
ñïà ñèáî….
.…
good!…
.…
ñïñ!…
.…
thanks for information….
.…
good!…
.…
hello!!…
.…
ñýÃêñ çà èÃôó!…
.…
hello!…
.…
good info….
.…
ñïà ñèáî çà èÃôó….
.…
ñïñ….
.…
áëà ãîäà ðåÃ!…
.…
hello….
.…
ñïñ!!…
.…
ñïà ñèáî çà èÃôó!!…
.…
ñýÃêñ çà èÃôó!!…
.…
ñïà ñèáî!!…
.…
áëà ãîäà ðþ….
.…
hello!!…
.…
ñïñ….
.…
ñýÃêñ çà èÃôó!…
.…
ñýÃêñ çà èÃôó!!…
.…
ñïñ çà èÃôó!!…
.…
áëà ãîäà ðåÃ!!…
.…
good info….
.…
ñïñ çà èÃôó….
.…
ñïà ñèáî çà èÃôó!!…
.…
ñïñ çà èÃôó….
.…
thank you!!…
.…
ñïñ….
.…
thanks for information….
.…
tnx for info….
.…
áëà ãîäà ðåÃ!!…
.…
hello!!…
.…
ñïñ çà èÃôó!…
.…
áëà ãîäà ðåÅ.
.…
ñïñ!…
.…
ñïà ñèáî….
.…
tnx for info!!…
.…
thanks for information….
.…
thanks for information!!…
.…
ñïñ çà èÃôó!!…
.…
ñïñ!!…
.…
tnx for info!…
.…
áëà ãîäà ðþ….
.…
ñýÃêñ çà èÃôó….
.…
thanks for information….
.…
ñýÃêñ çà èÃôó….
.…
ñïñ!…
.…
ñïà ñèáî!…
.…
good!…
.…
ñïñ….
.…
ñïà ñèáî!!…
.…
tnx for info!!…
.…
tnx for info!!…
.…
áëà ãîäà ðñòâóþ….
.…
good….
.…
ñïà ñèáî çà èÃôó….
.…
good info!!…
.…
áëà ãîäà ðñòâóþ….
.…
thanks….
.…
áëà ãîäà ðåÃ!!…
.…
thank you….
.…
thank you!!…
.…
ñýÃêñ çà èÃôó!!…
.…
thank you….
.…
áëà ãîäà ðåÃ!…
.…
thanks for information!…
.…
ñýÃêñ çà èÃôó….
.…
ñïà ñèáî çà èÃôó….
.…
ñïñ….
.…
áëà ãîäà ðþ!…
.…
thank you!…